Excel is one of the most commonly used operating systems frequently needed in work. Have you learned the How to insert images into excel 2010? How to do it. Don’t miss the article below from Softbuzz for more experience using and working with Excel. Let’s explore right now.
Simple Method to Insert Images into Excel
If you are looking for the simplest and fastest way to insert images into Excel, you cannot miss the following method. This might be a manual way but still widely chosen by Excel users for inserting desired images into Excel.
Don’t miss the standard Office installation package
Just follow these steps to insert an image into Excel.
- Step 1: Place the cursor at the position where you want to insert the image.
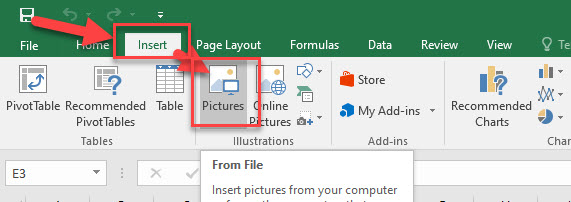
- Step 2: Select Insert on the toolbar in Excel. Then click on Picture.

- Step 3: Once the image data appears, search for and select the image you want to insert.
- Step 4: The image will now be inserted into the sheet, but its size may not be proportionate. Therefore, you need to resize the image to your desired dimensions. Click on the image, and dashed outlines will appear. Drag the edges to adjust the size as you wish.
Additionally, you can change the image size by clicking on Format. When the dialog box appears, modify the dimensions as needed. After completing the editing, drag the image to the data cell in the sheet.
If you want to make your sheet more lively with a background image, move the sheet to the back, select Right (click on the image). To send the image behind the content, choose Send to Back.
Batch Insert Images into Excel 2010
For short data files, you can manually insert images into Excel. However, for longer documents, using the traditional method is time-consuming and can affect work professionalism.
Adding images in bulk requires using image insertion functions in Excel. To successfully perform this, you need to follow these steps:
- Step 1: Place all images to be inserted into a folder. Copy the folder’s link.

…


