Many computer users may not know that you can adjust the mouse speed on Win 10 to make using the computer easier. Certain job tasks require using the mouse at different speeds to achieve the best results. So, how to adjust the mouse speed on Win 10 and Win 7? Join us for the detailed answers in the following article.
How to adjust mouse speed on Win 10
Because each operating system has different interfaces, we will guide specifically for each version. For Windows 10 — the latest operating system from Microsoft, the method to adjust mouse speed, also called adjusting the DPI of the mouse, is as follows:
You might be interested in.
How to check IP of Win 10
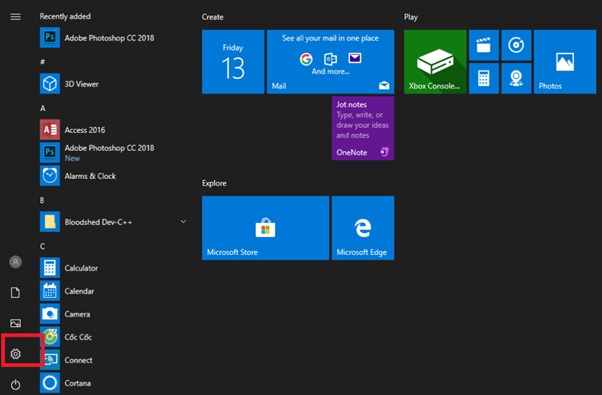
Step 1: Click on the Windows window or press the Windows key on your keyboard. Then select Settings. You can also press Windows + I as a shortcut.
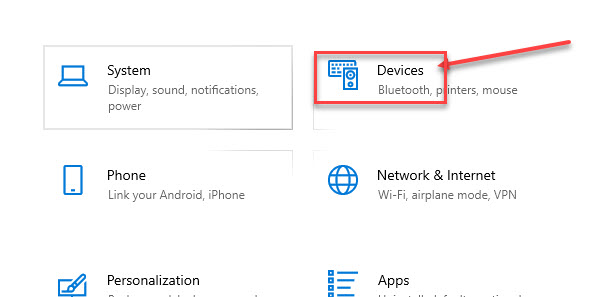
Step 2: In the Settings interface, select Device to open a new window interface.
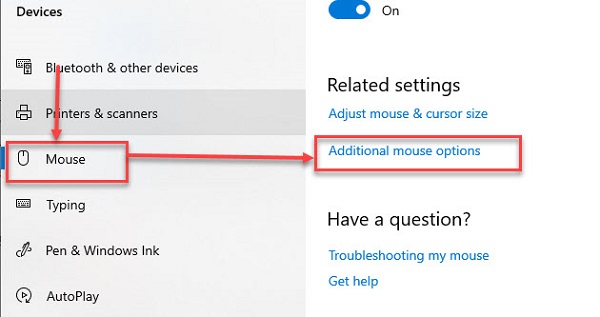
Step 3: Here, select the Mouse option and then click on Additional Mouse Options to continue opening this folder’s interface.
Step 4: In this new window, many options related to the mouse will be available. To adjust the mouse speed on Win 10, select the Pointer Options section (center).
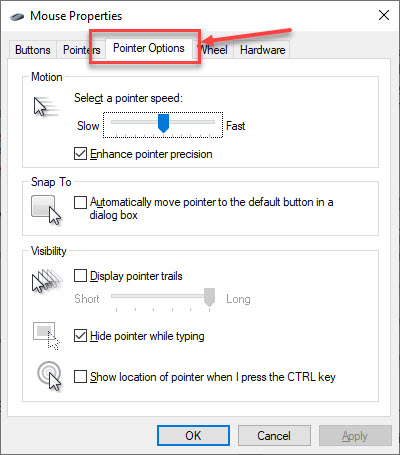
Step 5: At the Choose a pointer speed section, there will be a speed slider. The left side is Slow and the right side is Fast. Move the slider left or right to adjust the speed as desired.
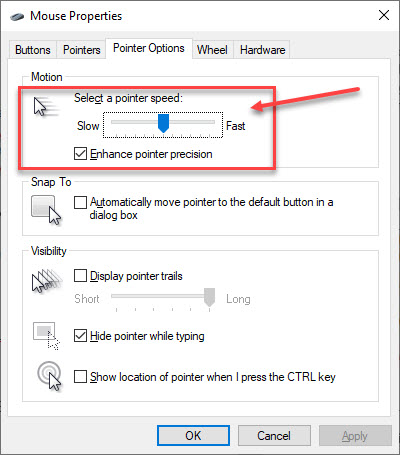
Step 6: Click OK to complete the settings. Now you can test your mouse speed by performing actions on the screen.
How to adjust mouse speed on Win 7
Unlike the Win 10 method, adjusting mouse speed on Win 7 is simpler because the Windows 7 interface is less complex. If you are using Windows 7 and want to change mouse speed, follow these steps:
Step 1: Click on the Windows icon on the top left corner of your main screen or press the Windows key on your keyboard.
Step 2: In the Windows search box, type Mouse and then select the Mouse icon with a mouse symbol.
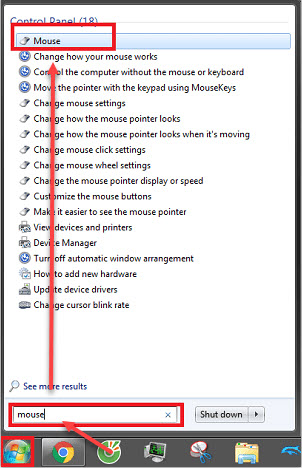
Step 3: In the opened Mouse folder interface, click on the third tab named Point Options.
Step 4: In this new window, you will see the Motion section at the top and a speed adjustment bar. Similar to Windows 10, to slow down the mouse movement, slide the control to the left marked Slow. To speed up the mouse, slide it to the right marked Fast.
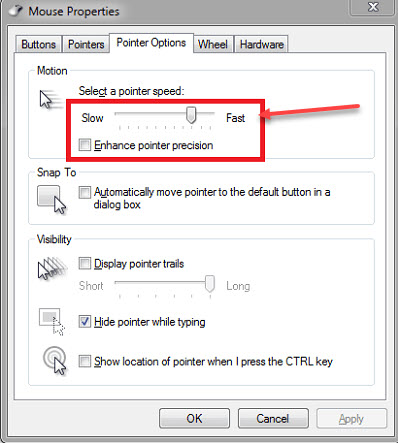
Step 5: Click OK to finalize the adjustment. Then test if the mouse speed meets your preference.
Conclusion
Above are the most detailed, simple, and easy-to-understand instructions for how to adjust Win 10 and Win 7 mouse speed by Softbuzz. Just a few steps, and you can set the mouse speed as you desire, helping you work more efficiently. If you have questions or want to learn more new computer tips, visit our website at https://softbuzz.net. Wishing you success in your adjustments!


