Are you looking for the fastest and simplest way to share wifi from laptop Windows 10. Do you want your laptop to become a free wifi hotspot? Don’t miss the following Softbuzz article to answer all your questions. Let’s get started now.
Why Need to Share WiFi from Laptop Win 10
Sometimes, you don’t always have wifi available. In some cases, you can only connect to the internet on your computer, laptop through a wired network connection. So the question is, is there a way to share wifi from laptop win 10 so that phones, other laptops, or tablets can connect to wifi and access the internet?
The answer is yes.
With the latest Windows 10 operating system, a share wifi from laptop win 10 feature is integrated for free without using third-party wifi sharing software like older versions, making it more convenient and not heavy on your computer when installing additional software.
How to Share WiFi Using Laptop Win 10
Sharing WiFi from Windows 10 by Using Windows Settings
This is the simplest and fastest way to share wifi from your win 10 laptop without any additional software. Here’s how to do it:
You might be interested in:
Step 1: Press Windows + I to open Windows Settings dialog
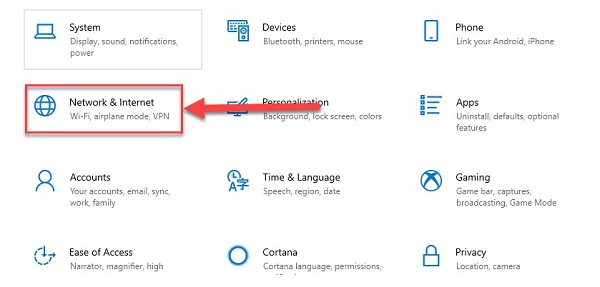
Step 2: Select Network & Internet
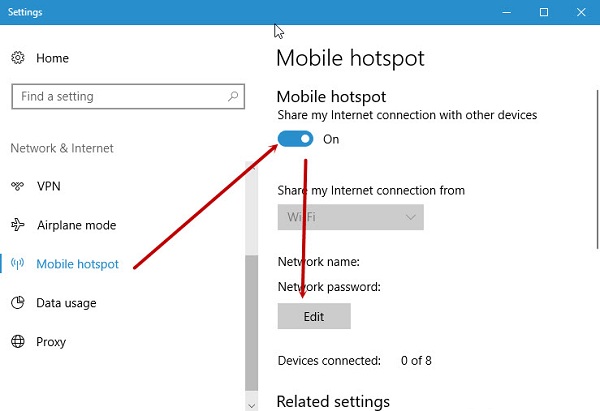
Step 3: Choose Mobile hotspot.
Step 4: Turn on Mobile hotspot => Under Share my Internet connection from, select the network your computer is connected to (might be LAN or WiFi)… => Click Edit to configure wifi sharing details like wifi name, password.
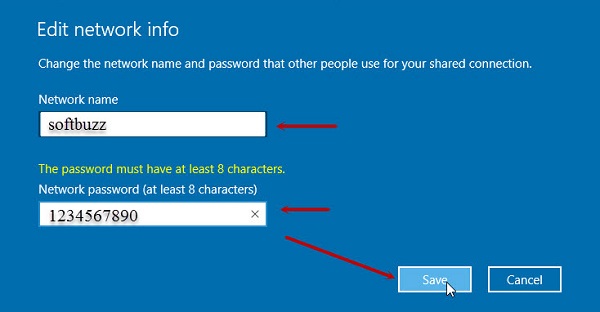
Step 5: Enter the wifi name and password for win 10 sharing — just do this once.
Sharing WiFi via Command Prompt (Admin) on Win 10
This is one of the methods you shouldn’t overlook for sharing wifi on win 10. Here’s how to do it:
Step 1: Press Windows + S to open search dialog => Type Command Prompt => Select Command Prompt => Choose Run as administrator
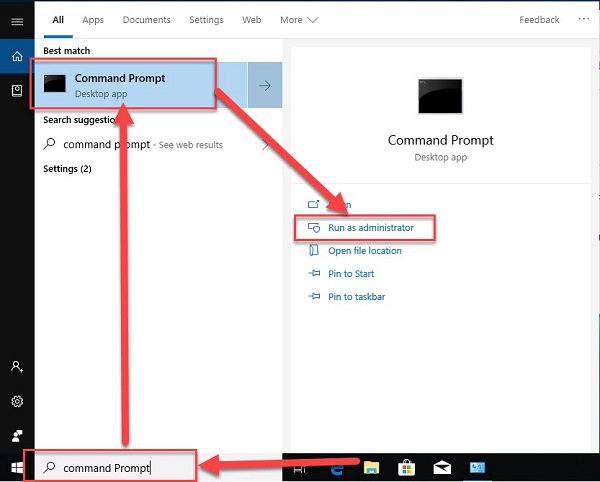
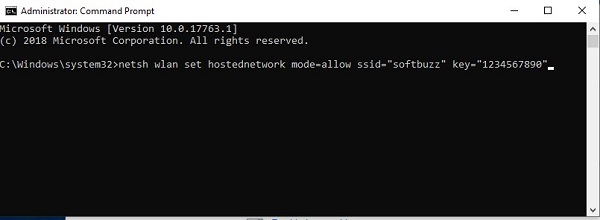
Step 2: Type the command netsh wlan set hostednetwork mode=allow ssid=”wifi-name” key=”password”
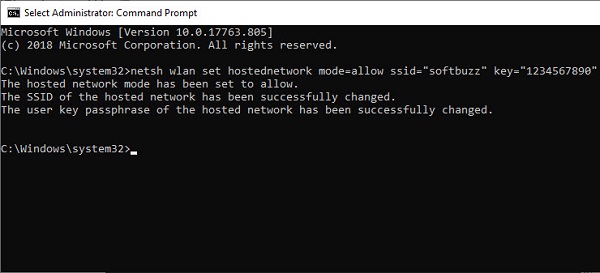
If you get a message as shown below, it means you’ve successfully created a wifi hotspot on win 10.
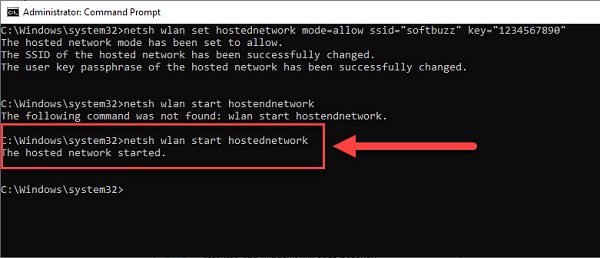
Step 3: Type the command netsh wlan start hostednetwork to activate the wifi hotspot on Windows 10.
Additionally, there are some commands you should pay attention to:
- netsh wlan show hostednetwork: check wifi status after sharing
- netsh wlan stop hostednetwork: stop wifi sharing from win 10 laptop
- netsh wlan set hostednetwork mode=dissable ssid=”wifi-name” key=”password”: cancel the created wifi sharing point on win 10
Step 4: Open Control Panel by pressing Windows + R => then type control panel
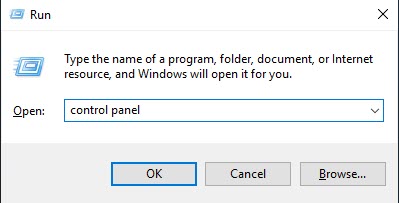
Step 5: Select Network and Internet
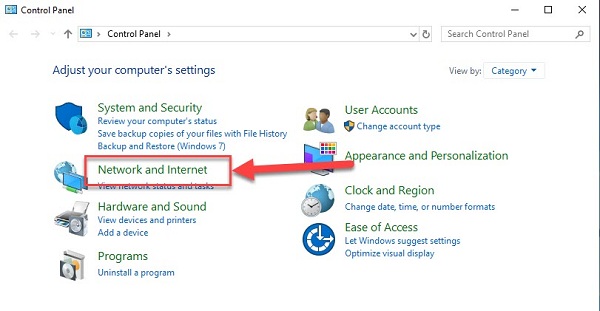
Step 6: Choose Network and Sharing Center
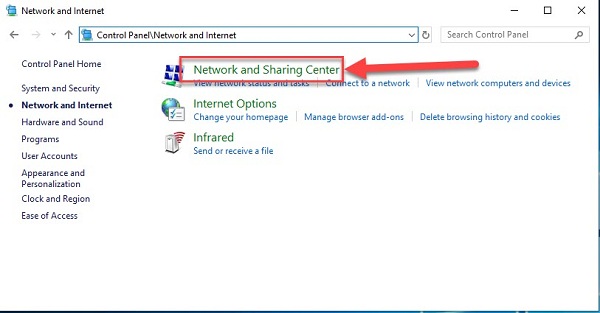
Step 7: Click Change adapter settings
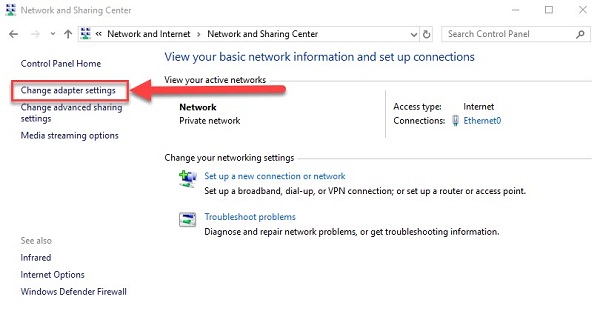
Step 8: Right-click on the wifi network you just shared from your win 10 laptop and select properties.
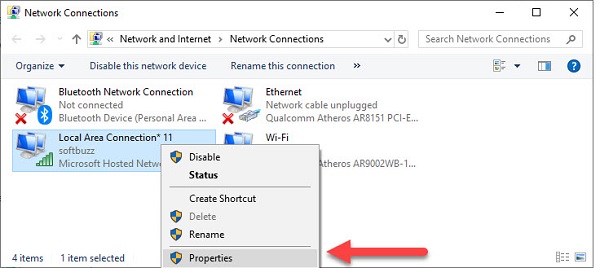
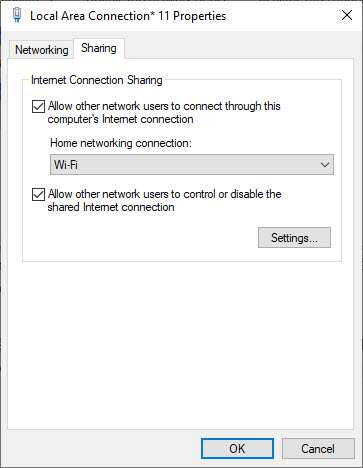
Step 9: Choose the options as shown below then click Ok.
Windows 10 WiFi Sharing Software Connectify Hotspot
This is a way to use third-party software to share wifi from your PC. Use this method only if the above methods do not work for you.
Connectify Hotspot is the best software for creating wifi on win 7 laptops that I often use. You can use this software to share wifi easily from your Windows 10 laptop. It is compatible with most Windows operating systems.
I will soon update the Windows 10 sharing software for Connectify Hotspot for you as soon as possible. Please wait and regularly follow Softbuzz to get the latest software updates.
Conclusion
Softbuzz.net has shared 3 of the best, fastest, and most popular ways to share wifi on Win 10. These methods will help you turn your Win 10 laptop into a free wifi hotspot. Please try and experience the results yourself. Wishing you success!
Written by Softbuzz

