Are you looking for how to number pages in Excel 2010 or other Excel versions? Unsure how to add page numbers? To resolve your query, we will share the simplest method to number pages in Excel effectively.
Let’s explore now.
How to auto-number pages in Excel 2010
This method helps you quickly and easily number pages in Excel 2010 or Excel 2013 and above. You won’t need to worry or struggle to find ways to number pages in Excel. You can download the official setup from here.
Let’s discover the automatic page numbering method in Excel as follows:
- Step 1: Open the Excel file you want to number.
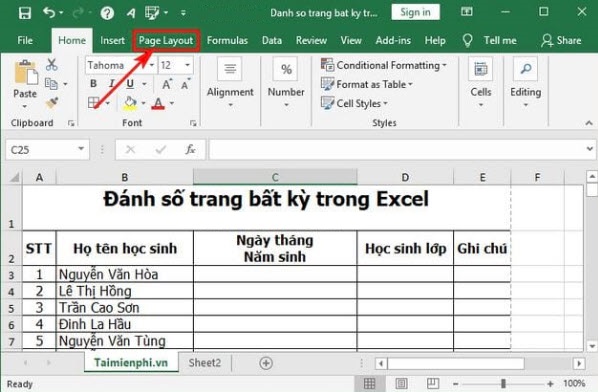
- Step 2: On the Excel toolbar, select View → then Page Layout. Your data will then be displayed as on a printed page, with A4 page dimensions.
- Step 3: You will see three cells at the header and footer of each page where you can enter data. Choose to number pages on the right, left, or center. Or, write the author’s name on the left and page number on the right.
- Step 4: To automatically number pages, click on the right, left, or center area where you want to insert page numbers. Then, go to Design → select Page Number.
- Step 5: To number pages as part of the total pages, do the following: select the area where you want the page number to appear → go to Design → select Page Number → choose Number of Pages, and you will see the total page number display update.

If you want to mark a page, click on the left, right, or middle cell of page 1 → then select Design → Different First Page → and enter content only for page 1.
How to number pages in Excel from page two
In addition to automatic numbering, you can choose to number pages from page 2 as follows:
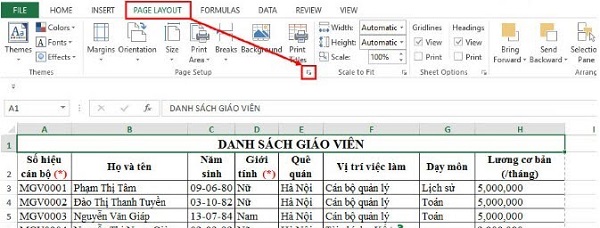
- Step 1: In Microsoft Excel, click on the Page Layout tab → then click the arrow icon at the bottom right corner.
- Step 2: In the Page Setup dialog box → select the Header/Footer tab → choose Custom Footer to add page numbers at the bottom of each page. Selecting Custom Header will add page numbers at the top.
- Step 3: For example, choose to place the number at the bottom (Footer), and a corresponding dialog box will appear. You can then choose one of three positions for the page number:
- Left section: place the page number on the left.
- Center section: place the page number in the middle.
- Right section: place the page number on the right.
- Step 4: After customizing the position in the &[Page] placeholder, click OK to save the changes.

How to remove page numbering in Word 2010
If you want to remove page numbers in Excel, follow these steps:
- Step 1: Similar to the numbering method, access the Page Layout tab. Then, click the arrow icon at the bottom right corner.
- Step 2: In the Page Setup dialog box → select the Header/Footer tab. In the Header or Footer section, select none and click OK.
Conclusion
We have explored the easiest way to number pages in Excel. You can follow these steps to number pages in Excel 2013 or 2016 as well. They are quite similar. Hopefully, this interesting knowledge will help you work with Excel more easily.
Thank you for reading!


![[Test Keyboard] The Fastest Way to Test Laptop Keyboard 2020 28 [Test Keyboard] The Fastest Way to Test Laptop Keyboard 2020 27](https://softbuzz.net/wp-content/uploads/2020/08/cach-test-ban-phim-laptop-nhanh-nhat-2020_softbuzz_8.jpg)