Are you looking for a Windows 10 screenshot method to capture a moment? Do you know how to quickly take a screenshot on your Windows 10 PC using only built-in software? Let’s explore this quick and convenient screenshot method with Softbuzz.
Let’s get started now.
The Easiest Ways to Screenshot on Windows 10 in 2023
Below are some of the fastest, simplest Windows 10 screenshot methods you shouldn’t miss. With these methods, you can quickly save memorable moments without using any additional screenshot software.
Related Interests
How to screenshot on Windows 10 using Printscreen
The Win 10 screenshot shortcut key Printscreen (or PrtScr) is the fastest and most convenient way to capture your screen on Windows 10.
However, using PrintScreen on Windows 10 will capture the entire screen. If you want to capture just a part, you will need to use Paint to crop the desired portion.
To take a screenshot using the PrintScreen shortcut, follow these steps:
Step 1: Choose the moment or image you want to capture.
Step 2: Press the Printscreen (PrtScr) key on your laptop or external keyboard.
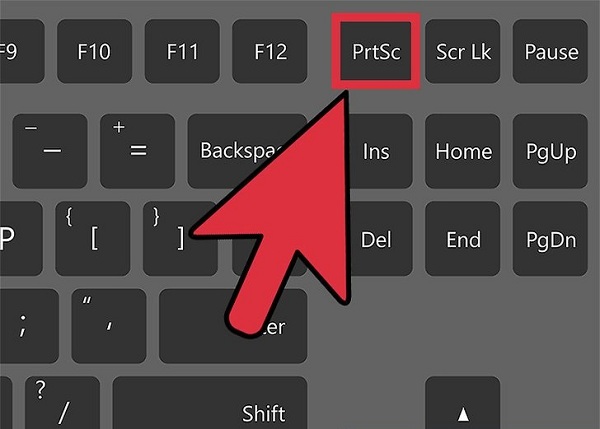
Step 3: Open Paint. You can do this by one of two ways:
Method 1: Press Windows + R to open the RUN dialog, then type mspaint.
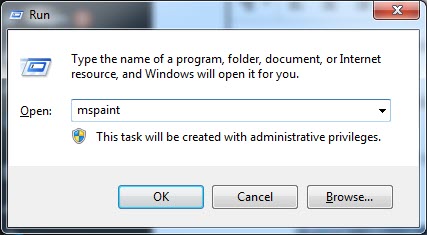
Method 2: Search for Paint in the search box, then open the Paint application.
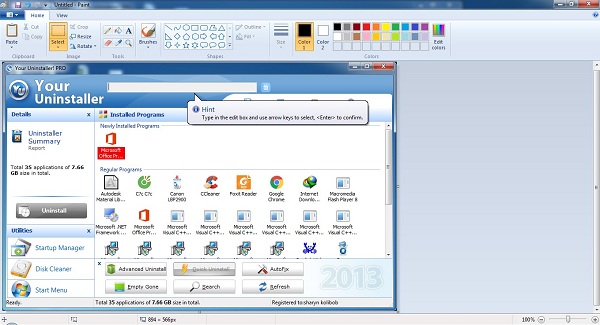
Step 4: In Paint, paste the screenshot you just took by pressing Ctrl + V.
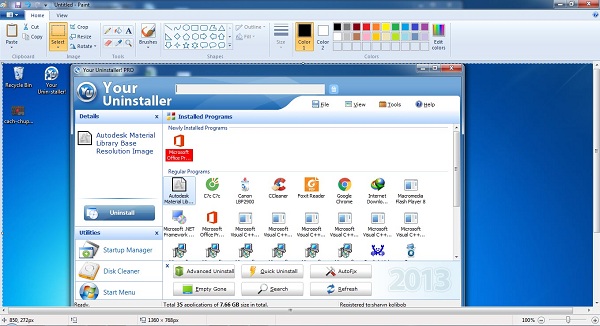
Step 5: You can edit, crop, add annotations, etc. After finishing, remember to save your screenshot.
How to screenshot on Windows 10 using Alt + PrintScreen
The shortcut Alt + PrtScr helps you capture only the active window. The steps are similar to using PrintScreen, except in Step 2, you press Alt + PrintScreen instead of just PrintScreen.
How to screenshot on Windows 10 Laptop using Windows + Print Screen
The shortcut Windows + Print Screen captures the entire screen and automatically saves the image in the Pictures/Screenshots folder. This method only works on Windows 10.
How to screenshot on Windows 10 using Snipping Tool
To take a screenshot on Windows 10 with Snipping tool, use the built-in Windows software. You can use Snipping Tool to capture a part of the screen, a window, or the entire screen, without needing Paint for editing.
Here’s how:
Step 1: Choose the moment, image, tool, window, or application you want to capture.
Step 2: Open Snipping Tool by one of these methods:
Method 1: Press Windows + R, type snippingtool, and press Enter.
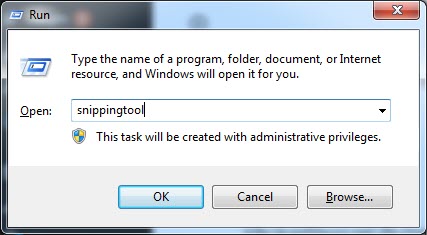
Method 2: Search for snippingtool in Windows search (Windows + S).
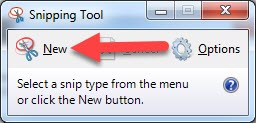
Step 3: Click New to start capturing on your Windows 10 laptop.
Step 4: Drag your cursor to select the area you want to capture.
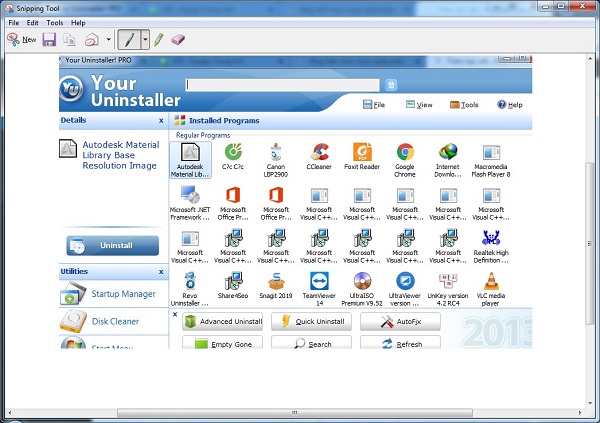
Step 5: You can edit the image with simple tools and save it.
Conclusion
Softbuzz.net has shared with you various quick screenshot methods for Windows 10 using built-in tools. After reading our guide, you should know several ways to capture your screen and preserve beautiful, memorable moments.
Additionally, you can take screenshots with FastStone Capture, which is easy to find and download on softbuzz.
Edited by Softbuzz

