Are you looking for how to make a table of contents in Word 2016? Do you not know how to create an automatic table of contents in Word? Let’s explore the simplest way to create a table of contents with Softbuzz now.
Is it advisable to use automatic table of contents in Word 2016?
As we know, creating a table of contents is an indispensable step when making project reports, theses, or work reports. A table of contents helps you grasp the document’s content easily and find information more conveniently. This is one of the useful tricks and should not be missed when using Office 2016. You can get the most standard Office installation at:
However, not everyone knows how to create a table of contents in Word 2016 even though it only takes a few simple steps to do so.
Besides creating an automatic table of contents, automatic page numbering is also a crucial step to complete a report. If you don’t know how to create page numbers, check out the article at:
How to make a table of contents in Word 2016
You can completely apply the steps below to do the same in Word 2010 or 2013. The process is entirely similar.
#Step 1: How to automatically create a table of contents in Word 2016
Step 1: Open the document or file where you want to create an automatic table of contents.
Don’t miss:
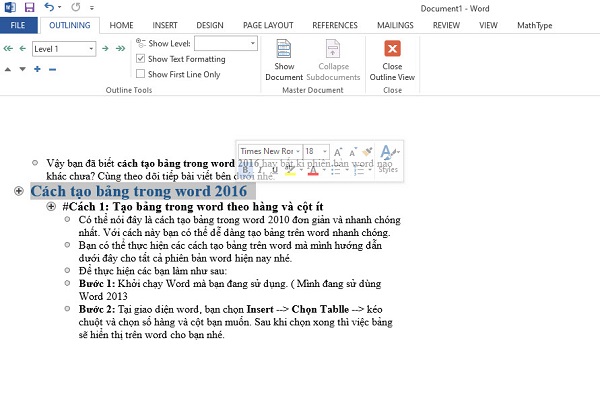
Step 2: Choose View -> select Outline to switch to Outline view, which makes it easier to assign Level to document headings.

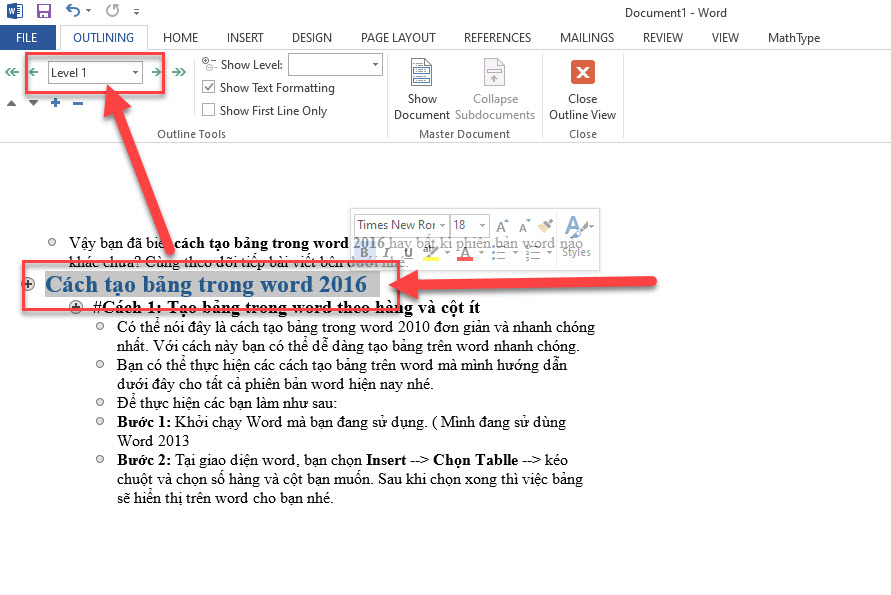
Step 3: Highlight the text you want to set as a heading -> choose Level accordingly. You need to determine which one is the Main part (main heading) and which is the sub-part (subheading)

For example:
- “How to create a table in Word 2016” is level 1 (main part).
- “#Step 1: create a table in…” is level 2 (sub-part).
- You choose similarly for all remaining headings.

Step 4: Choose View -> select Print Layout
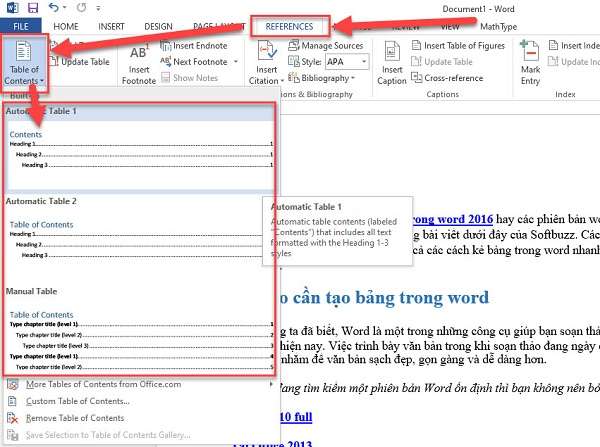
Step 5: Place the cursor at the position where you want to insert the automatic table of contents (usually the first page of the document). Then go to REFERENCES -> select Table of Contents -> choose the display style you prefer for the table of contents.

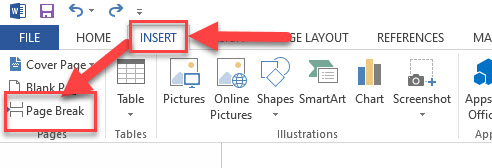
Step 6: Select INSERT -> choose Page Break

Vậy là bạn đã có thể kiểm tra kết quả sau khi thực hiện hướng dẫn cách làm mục lục trong word 2016 tự động
#Step 2: How to update the table of contents
However, sometimes editing the document causes your headings to jump pages. The question is how to update the table of contents?
Read more:
To automatically update the Table of Contents in your document, you can do one of the two methods below:
- Method 1: select REFERENCES -> choose Update Table
- Method 2: right-click on the table of contents -> select Update Field

The new dialog box appears, and you select the mode to auto-update the table of contents.
- Update page number only: only update page numbers (commonly used)
- Update entire table: update all content (headings, page numbers) of the table of contents.
Conclusion
Softbuzz has guided you through the steps to create a table of contents in Word 2016. You can follow the same steps for Word 2010 or 2013. The process is identical.
Hopefully, after reading this article, you’ll gain more useful tricks to help you use office tools more effectively.
Compiled by https://softbuzz.net/


