“How to turn off spell check in word 2010” or “how to remove red underline in word 2010” has been a concern for many. Don’t miss the following article from Softbuzz, where you’ll learn how to eliminate this annoyance in just a few simple steps.
Let’s get started now.
Should You Turn Off Spell Check in Word?
If you often type documents in Word, you’re probably familiar with the appearance of red and blue underlines beneath your text.
Cause: This is due to the Office version having auto spell check mode enabled (when typing in English). This feature is a built-in spell checker in Word. It helps users identify spelling mistakes during document editing.
Don’t miss other interesting office tips at:
How to create a table in word 2016
However, it can be quite annoying for users. When drafting text, red and blue underlines often appear at the bottom, which can cause eye irritation.
So, you might be wondering if there’s a way to turn off spell check in Word or to remove red underlines in Word.
The answer is yes. Keep reading this article to learn how to get rid of this discomfort.
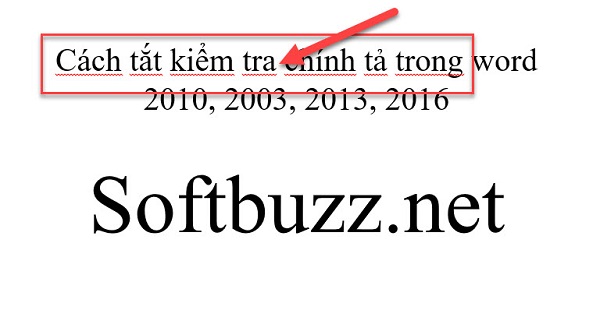
How to turn off spell check in Word 2010 and other versions
#2 How to remove red underlines in Word 2003, 2007
To remove red underlines in Word 2007 or 2003, simply follow these easy steps outlined below.
Step 1: Launch your Word text editor in Office 2003 or Microsoft Office 2007.
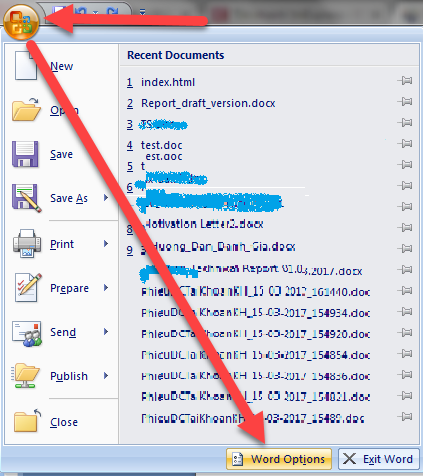
Step 2: Click the Office icon → select Word Options
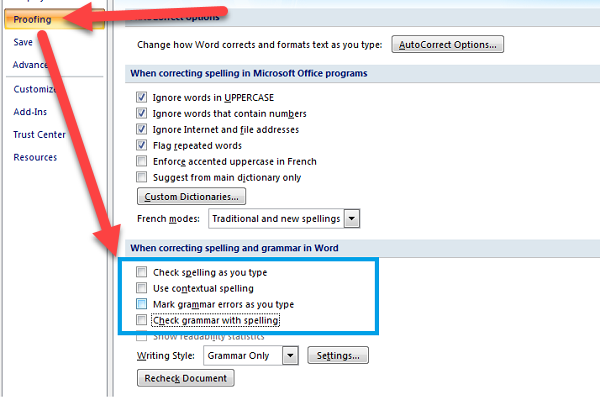
Step 3: Choose Proofing → uncheck all boxes under When Correcting spelling and grammar in Word.
#2 How to remove red underlines in Word 2010, 2013, 2016
Turning off spell check in Word 2010 and newer versions like Microsoft Word 2013 or 2016 is very similar. Follow these steps to remove red and blue underlines in your documents.
Step 1: Open the text editor you are using. If you haven’t a stable text editing software, it’s best to use the official version of Softbuzz.
Microsoft Office 2010 full
Step 2: Click FILE

Step 3: Choose Options
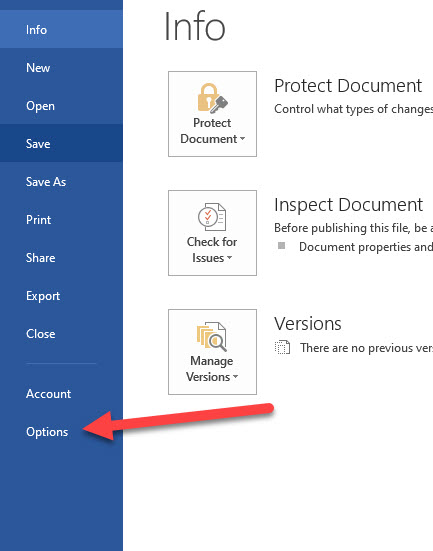
Step 4: Here, you can disable red underlines using one of the two methods below. I usually prefer the first method.
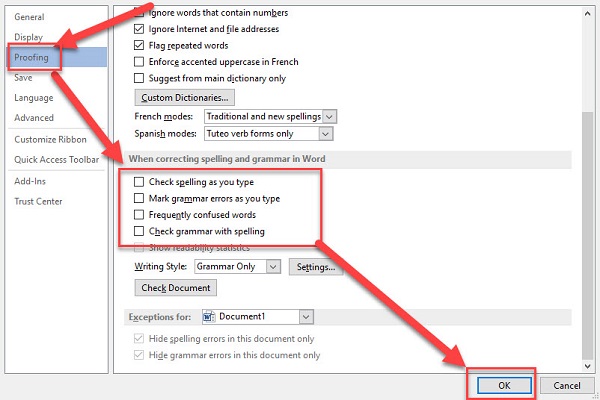
Method 1: Permanently turn off spell check in Word 2010
Select Proofing → uncheck all items under When correcting spelling and grammar in Word → click OK to finish.
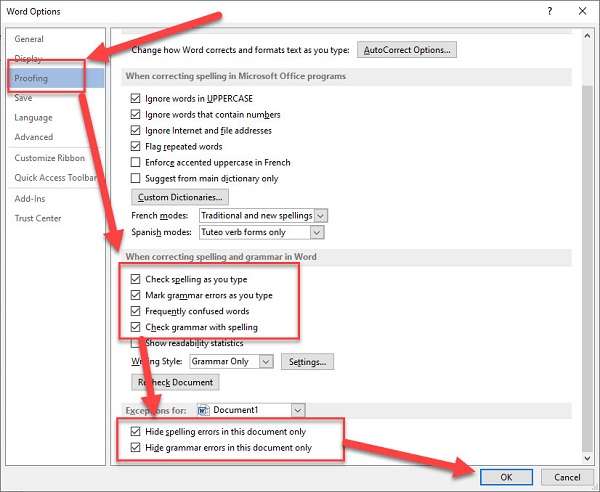
Method 2: Hide red underlines in Word
Choose Proofing → check the boxes in the section When correcting spelling and grammar in Word → check the two options ‘Hide spelling errors in this document only’ and ‘Hide grammar errors in this document only’ (as shown below) → click OK to finalize.
That’s it. Test the results to see the improvements.
Video tutorial
Conclusion
Softbuzz has guided you on how to permanently disable spell check in Word 2010, 2013, 2016, 2003, 2007 or hide spell check indicators. Just a few simple steps, and those eye-catching underlines will no longer bother you.
Isn’t that great? Don’t forget to share this article with friends so everyone can benefit.

